

Misc Links
36” Spectre Hacker-model Webstore
36” TH Spectre Webstore
Spectre Assembly Manual
FPVWRA Website
Super Slotter Tool
First Impressions
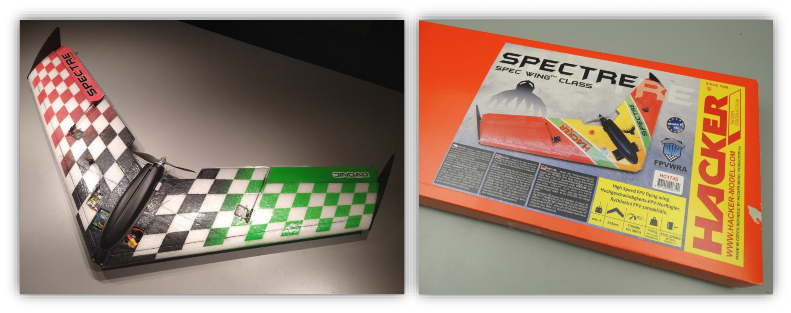
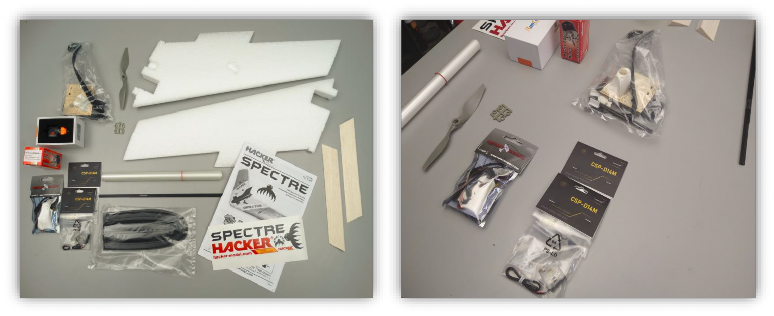
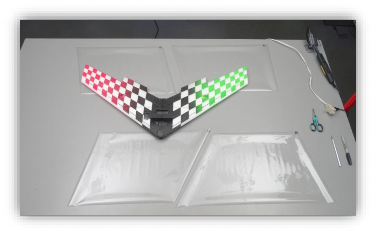
This is kit carried by Twisted Hobbys and manufacutred in the Czech Republic by Hacker Model Productions. The parts count is very low, basically two wing halves and a hardware packet that included some 3D printed parts, some laser cut wood parts, wooden ailerons, some clear covering film and other assorted bits. Having the clear film included with the kit is a really nice touch.
Specifications
Wingspan: 36.0" / AUW with FPV Gear: 590g / 4-channel
Weight for my build came in at 558g, this is ready to fly weight, fully loaded with the FPV gear mentioned below.
What Else is Needed
1x 2826 sized motor 1500 to 2200kV (depending on your cells and intention) 1x 20-30A ESC
2x 10-15g Servos
1x 6-inch prop (pitch of choice depending on motor kV and cell count) TX/RX 4 - 6 channel (with Elevon mixing capability)
3s or 4s 1500/2200mah batteries
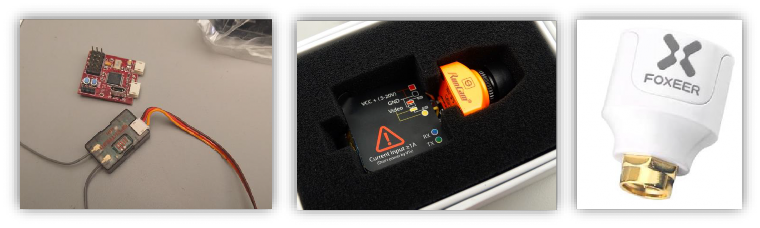
This build will be done with the TH Servo combo, the Hacker model ESC, a nonbranded 2826/2200kv motor, an Aura5 paired with SRXL2 receiver, RunCam Split Mini 2, a Hawkeye 200mW VTX hooked to a Foxeer v4 Lollipop Mini Stubby Antenna and all powered by Ovonic 2200/3s/35c batteries. These batteries are surprisingly small, they are not as long as a “standard” 3s/2200 battery and were a really nice fit into the stock battery bay, leaving a little extra room to stuff all the wires. The RunCam Mini Split 2 has an onboard HD recorder, so you don’t want to power it off the VTX power tap (it draws too much current for most VTX units to handle), so a Castle CC-BEC 2.0 was used and buried inside the left wing, just to the left of the battery bay.
Assembly
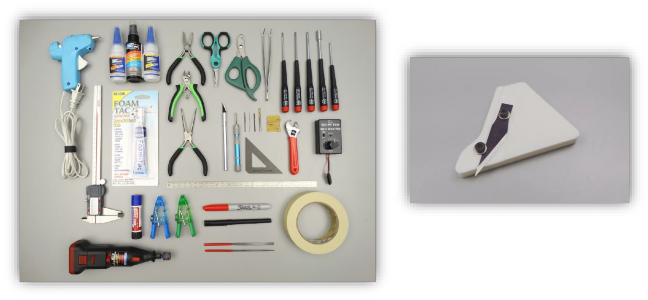
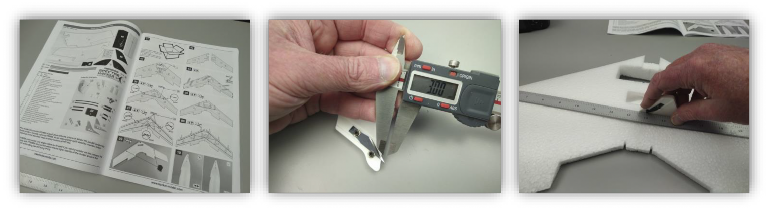
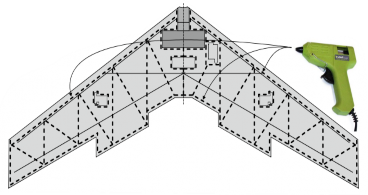
You will need to have an assortment of tools and glues, something similar like shown below. There is also a really cool little tool that was recently released by Twisted Hobbys for cutting slots into the foam for the carbon spars and round rods. This tool was also used at a very shallow setting for the cutting the tape for the paint scheme that was done on this project. It is worth looking into and adding to your workbench, especially if you build a lot of foamies or have a need to make cuts at a very specific depth during a build.
Unique Features
The thing that probably stood out the most when I opened the box, was that it included the clear covering that gets applied to the top and bottom wing surfaces, AND very specific instructions on how to apply it. I was skeptical at first on the covering, but followed the instructions and was very pleased with the results. This was designed to be a Spec FPV Race Wing, so there are also very specific dimensions and all the necessary cutouts and 3D printed parts for all the radio gear and FPV gear.
Build Notes
As with any build, read the instructions and understand the steps. Sometimes it might be necessary to ready ahead a little to fully understand what the intentions are for the current step you are on. The manual for this model is very well done, with a mix of diagrams and photos.
JOINING THE WING HALVES - The build starts by joining the two wing halves together. For those that have followed my build threads used my assembly manuals, you will know that I almost always suggest doing the foam-to-foam joints with Welders or FoamTac. For this model however I recommend using CA. The reason for this is because the alignment of the leading and trailing edges is super critical. With CA you can hold the position perfectly and then apply the CA to secure it exactly where you want the two halves to line up. Take
your time and only do one section at a time.
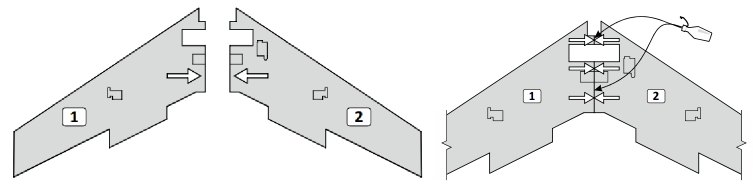
INSTALLING CARBON SPARS - There are lots of carbon rounds embedded in this wing to give it strength and rigidity. The shorter two spars are the center top and center bottom spars. The manual does a great job of showing where all the spars go and there are little round notches in the foam to help line up your straight edge when making the 3mm deep cuts. Use the Twisted Hobbys "SuperSlotter" set to 3mm to make this process a breeze and to get the exact depth needed.
Start by installing the shorter two on the top and bottom spars then all the longer ones, top and bottom, DO NOT glue them in yet. Note that the leading-edge ones will overlap the center spars, this is by design, and it is meant to tie the structure together once the glue is applied.
GLUING THE CARBON SPARS - This next step is super important, again refer to the manual, but you want to make sure that before you start to glue the spars that the leading edges are perfectly straight and that the trailing edges meet up with the included spacer guide that is part of the wood kit. The larger notch is for the center of the trailing edge and the small notch is for the gap at the wing tip trailing edges. This gage is for both top & bottom for the center and top & bottom / left & right for the tips. Take your time with this, it is the key to your wing flying great or horrible. Since the carbon rods are just pushed into the slits that you cut, you are able to manipulate the foam, and the resistance of the rods in the slits will kind of hold the position until you apply the CA. Once you are happy with this, apply CA to five or six spots along each spar, one spar at a time, checking with the gage, both top and bottom after each spar. When all the spars have been tacked in, and you are still happy with the shape of the wing, then you can apply CA to the full length of each spar, again, one spar at a time, checking the geometry after each spar. This is not difficult, you just do not want to rush this process, your efforts and patience’s here will be rewarded with any awesome flying wing.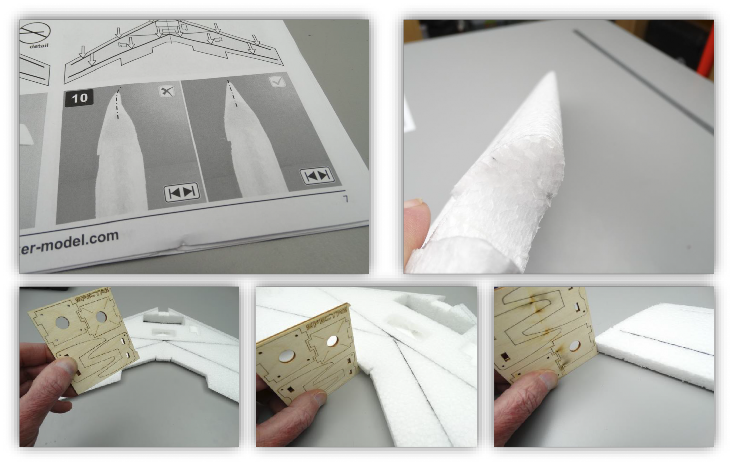
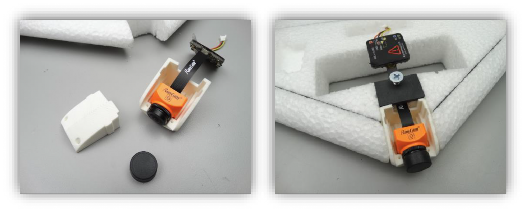
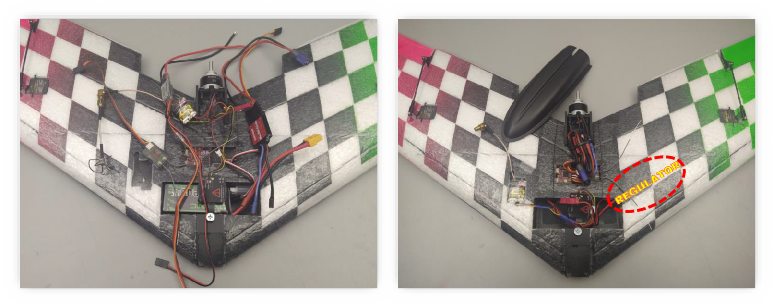
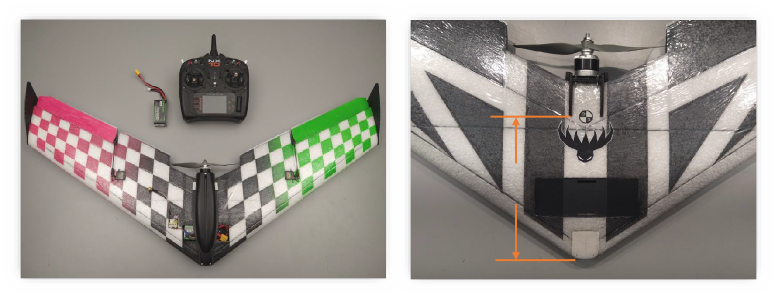
CAMERA MOUNT - Make sure the camera you have chosen fits into the nose cone mounting area. It is sized and intended for a mini camera. I chose to build this according to the rules of the FPVWRA just in case the opportunity presented itself to me, but most of the time will likely either fly Line-Of-Sight (LOS) or FPV for fun, so with that in mind, I installed the RunCam Mini Split 2 so that I could get some HD video footage of the flights without the need of adding another camera for the HD recording. This did however mean that I would have to find a place for the board attached to the camera, and a regulator to power it off the main battery. Initially I was a little concerned about space and weight for this objective, but in the end with a little creativity, it all worked out, just enough room, just shy of the target weight and perfect CG.
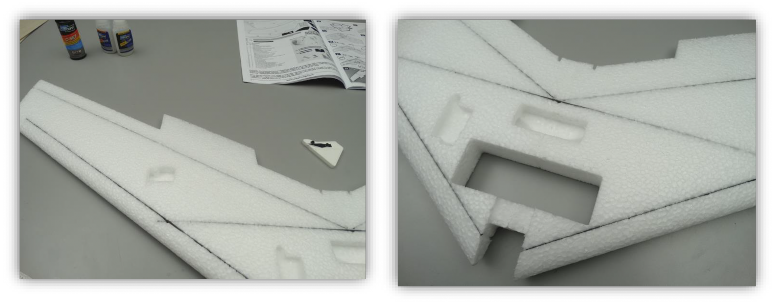
BATTERY BAY - Glue the Battery Bay Floor into place from the underside of the wing. Make sure that it is nice and flush so that it does not get snagged on anything during landings and that there is a good fit up to give the glue joint strength. The size of the battery bay is for a traditional or “standard” 3s/2200mAh battery. Knowing that I was going to be a little “fat” and tight on space I poked around some to see what was out there online for batteries and stumbled across a smaller and lighter battery of the same cell count and capacity, the Ovonic 2200/3s/35c batteries. I found them on Amazon and after several dozen flights am still very happy with them. They are significantly smaller and lighter. The extra space was welcome, and the weight savings offset the camera board and the needed regulator.
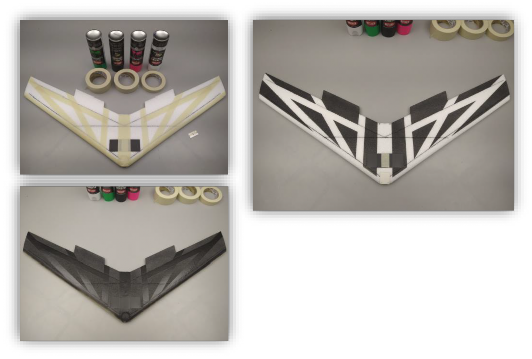
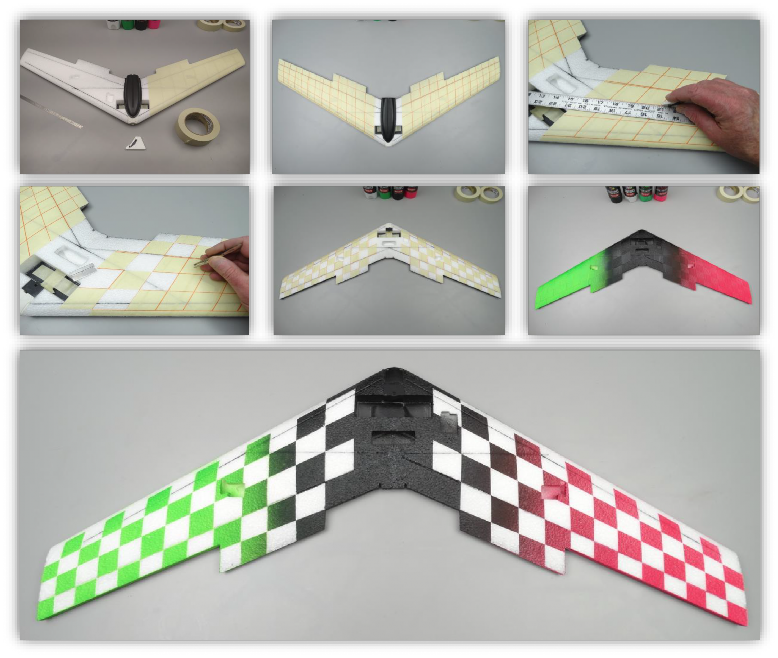
ADDING CHARACTER – This is an FPV Wing and if you intend to solely fly FPV, there is really not much need for a fancy on contrasting paint job. I like to fly both FPV and LOS. I am not a painting expert, but I did want to come up with something clever and contrasting. The first order of business was to determine colors. I decided for a simple black and white pattern on the bottom, and a faded checkered neon pink and neon green for the top side. The pattern itself was pretty easy to do with standard masking tape, and I was really happy with the results. Follow the directions in the manual for prepping the foam surface prior to applying the paint. You will want to sand all the surfaces with an 80 to 120 soft sanding block to smooth out all the little bumps in the foam. This will make for a nice smooth surface for the paint, and also help when applying the clear film to seal everything up and adding strength.
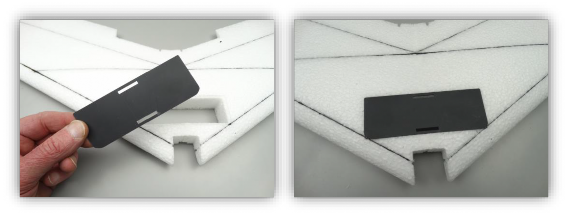
APPLYING THE FILM - Study pages 9, 10 and 11 in the Manual carefully. Personally, I have never applied a film to a foam plan before, so this was unfamiliar to me and I was very skeptical. I decided to trust the instructions and followed them to a tee. Honestly, I could not have been happier with the results! It sealed everything up nicely, made for a smooth surface and added an incredible amount of strength.
Adding the Electronics
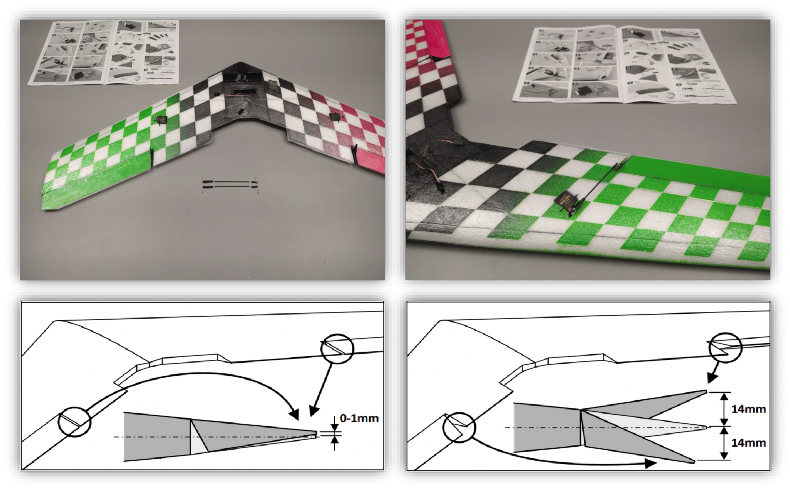
Once you get all the covering on per the instructions, and the Ailerons painted covered and hinged onto the wing, you can mount the servos and build the control links. Nothing tricky about any of this, just make sure the servos are electronically centered and perpendicular. Don’t glue the clevis ends on until you have the slight amount of up aileron (reflex) set as per the manual, then add a small drop of CA to the clevis/rod and hit with kicker. If you were careful in doing all this, you should not have to add any trim except for what subtrim might be needed to have the servo arms exactly perpendicular to the servos.
TEST AND FIT - Plug everything in and make sure it all works, then… find a place for it all! As mentioned earlier, the RunCam Mini Split 2 needs a regulator, so that was buried just off to the side of the battery bay.
Center of Gravity – 162mm from the Nose
There is a diagram on page 4 of the manual that indicates the CG point. The goal would be to locate all the gear to achieve the CG point without having to add any weight. For my build I used a lighter smaller format 3s/2200 battery to make up for the little extra weight up front with the HD board for the camera and the regulator. In the end for this build and the gear used, the CG point came out exactly in the right spot, and slightly under the overall weight listed for the model with a full FPV setup.
In the Air
The Spectre is a great flying wing, either LOS or FPV. With the Aura5 and the Lauch Mode, it is ridiculous how easy it is to launch; Enter Launch Mode, go to full power, and Frisbee toss, don’t touch the sticks until you are ready to take over and fly, a good time to get situated and to pull the goggles down. With the recommended 3s setup this wing is quite fast, the box says it clocks at 105mph. I did not have a radar gun or GPS on board, but it did seem like it was clipping along very nicely. Rolls are very axial and with the suggested control throws (14mm up & down) it was responsive and easy to put right where I wanted it.
Pros & Cons
The battery bay for a standard sized 3s/2200 was tight, and no real room for the battery cables, with the shorter format Ovonic 3s/2200 battery there was a little more space to manage all the wires and to keep everything nice a tucked away. Under the canopy is tight, on the first couple flights stuff was getting hot under there. I added a couple small cut outs for airflow and will actually open the canopy up even more with some additional slots before I fly it next time. This wing with the covering is very strong and robust and should hold up well to the rigors of FPV Racing. On the cover of the box, it indicates that it meets all the FPVWRA (FPV Wing Racing Association) rules for their Spec Class. I poked around a little online to see if there was any additional information on the FPVWRA, there was a little, but even the main website looked like it had not been updated in a while.
Final Thoughts
If you like wings, this is a nice sturdy grab and go wing for either FPV or LOS. Even if you feel like you will only fly this wing LOS, definitely set it up for FPV. It is designed around having all the gear in place for good CG and flying characteristics, and if you are not a seasoned hand launcher of wings, put in the Aura5 or other small format controller that has a Launch Assist mode, you will love it..!
Enjoy - Chris D. - Team Twisted – 10/07/2023